Friday, January 31, 2014

QR Code Caprice

QR Codes can bring a classroom or project to life… I can not take credit for all of the QR Code ideas I am about to share. There are so many creative teachers inspiring students and I wanted to share some of the ideas I have come across during my travels as an integrator. QR Codes can be created with an iPad or a computer. At the end of this article I will explain ways to create and read QR Codes.


1. Make a Project Come to Life: For any project, book report,
collage, poster, lab report, artwork, etc. have students record their voice using an app like AudioBoo, or a website like Record MP3 talking about their project, explaining their understanding of a concept, or reading the story that goes along with their project.  Or have students make a movie or movie trailer using an app like iMovie, the camera on an iPad/iPod, the camera on a laptop, the movie editor in YouTube, a Flip Camera and software, or other various video recording devices plus software. Then upload the video or audio to a site that will give the work an url like Flickr, YouTube, Vimeo, or Picasa. From there students can create a QR Code to print and attach to their project. AudioBoo generates QR codes directly on their site.

In Photo Above: Mrs. Lariviere's 2nd grader's Monster Stories, QR Code leads to student audio story.


2. The QR Keychain: Create a keychain of QR codes based on different needs in the classroom. The keychains can be for independent study math videos, tutorials, audio books, classroom library book reviews, morning messages, favorite websites for each standard, etc.

Keychain photo provided by http://www.pinterest.com/katstaton/


3. A QR Scavenger Hunt: Create a scavenger hunt. Most QR generators allow the user to have a QR Code for simple text. This brings me back to finding my Easter Basket during childhood. My parents created clues that led to new clues within plastic eggs that would eventually lead me to my Easter Basket. I think that I will create a hunt using QR Codes with my own children this Easter. Teachers do not have to be the only creators. Creating a scavenger hunt would be a fun task for students as well, especially for those students that need an extra challenge.


4. Book Reviews/Trailers: This can be done in audio or video form using apps like the ones mentioned in example #1. The QR Code can be archived/attached on the back of the actual book for students to continue to use every school year or made into a bulletin board to share with others for that moment in time. If you use the bulletin board format, I recommend taking some time for a museum walk before the bulletin board is removed.


Bulletin Board: Mrs. Cartwright, 4th Grade


Museum Walk: Ms. Nason, 3rd Grade


5. Center Work: Have QR Codes displayed during center work. It will help students quickly get to their destination on the device they are using. When students complete the assignment, they can be prompted to another QR Code. Help videos can be included at the center so that your time is freed up to work with students in small groups.


6. Writing Promt Dice: A student is stuck on what to write about. Let them roll for ideas. Check out these writing prompt dice and print your own from my Literacy Site


7. Videos Demonstrating SOPs: Record students acting out the proper way to do different things in the classroom. Then when a student does not remember the appropriate Standard Operating Procedure, they can watch the video by scanning the corresponding QR Code. This allows for students to have a learning time out where they can find a quiet place to sit and watch a video on the expected behavior or procedure for any given circumstance.


8. Self Check Work: Create answer checks for any work that has a correct answer, as much as I am not a fan of worksheets, this idea works well with math. Even better, have a QR code on the top of the worksheet linked to a video explanation of how to do the work, like algorithms. After a student checks their answer, they can watch a "How To" video if they did not get the answer correct before moving on to the next problem.


Making a QR Code: To make a QR Code on an iPad, I like to use QR Reader or Qrafter (Not all options are free when using Qrafter). All you need to do is click create, once in the app, and then choose if you want the QR Code to send to a person's device, to a web address, phone number, simple text, GEO location, email address, etc. You can email the QR Code to yourself to print it if you do not have a printer hooked up to your tablet. (Remember, all on-line videos have an unique web address.) When on a computer I like to use a simple bookmarklet that I added to my browser tool bar or if I want to create a fancy QR Code I use Visualead or QRHacker. Great Video on QR Code Creating.

Reading a QR Code: To read a QR Code on an iPad, I like to use QR Reader or Qrafter. 1. Click on a QR app. 2. Then click on scan. 3. Lastly, put the code in the middle of the scanner screen. Sometimes you have to move the iPad a little to get the code to scan. The website will open up within the QR app, but you also have the option to open up any site in Safari or another browser if you click on the share button. I don't really scan on a computer, however there is software to download if your computer has an iSight camera.


Photo Gallery of ideas:

Ms. Burnell, 2nd Grade, Holiday Memory Writing Activity


Mrs. Melcher, 2nd Grade, Book Review


Mrs. Melcher, 2nd Grade, Algorithm Poster


Ms. Nason, Grade 3, Penguin Project
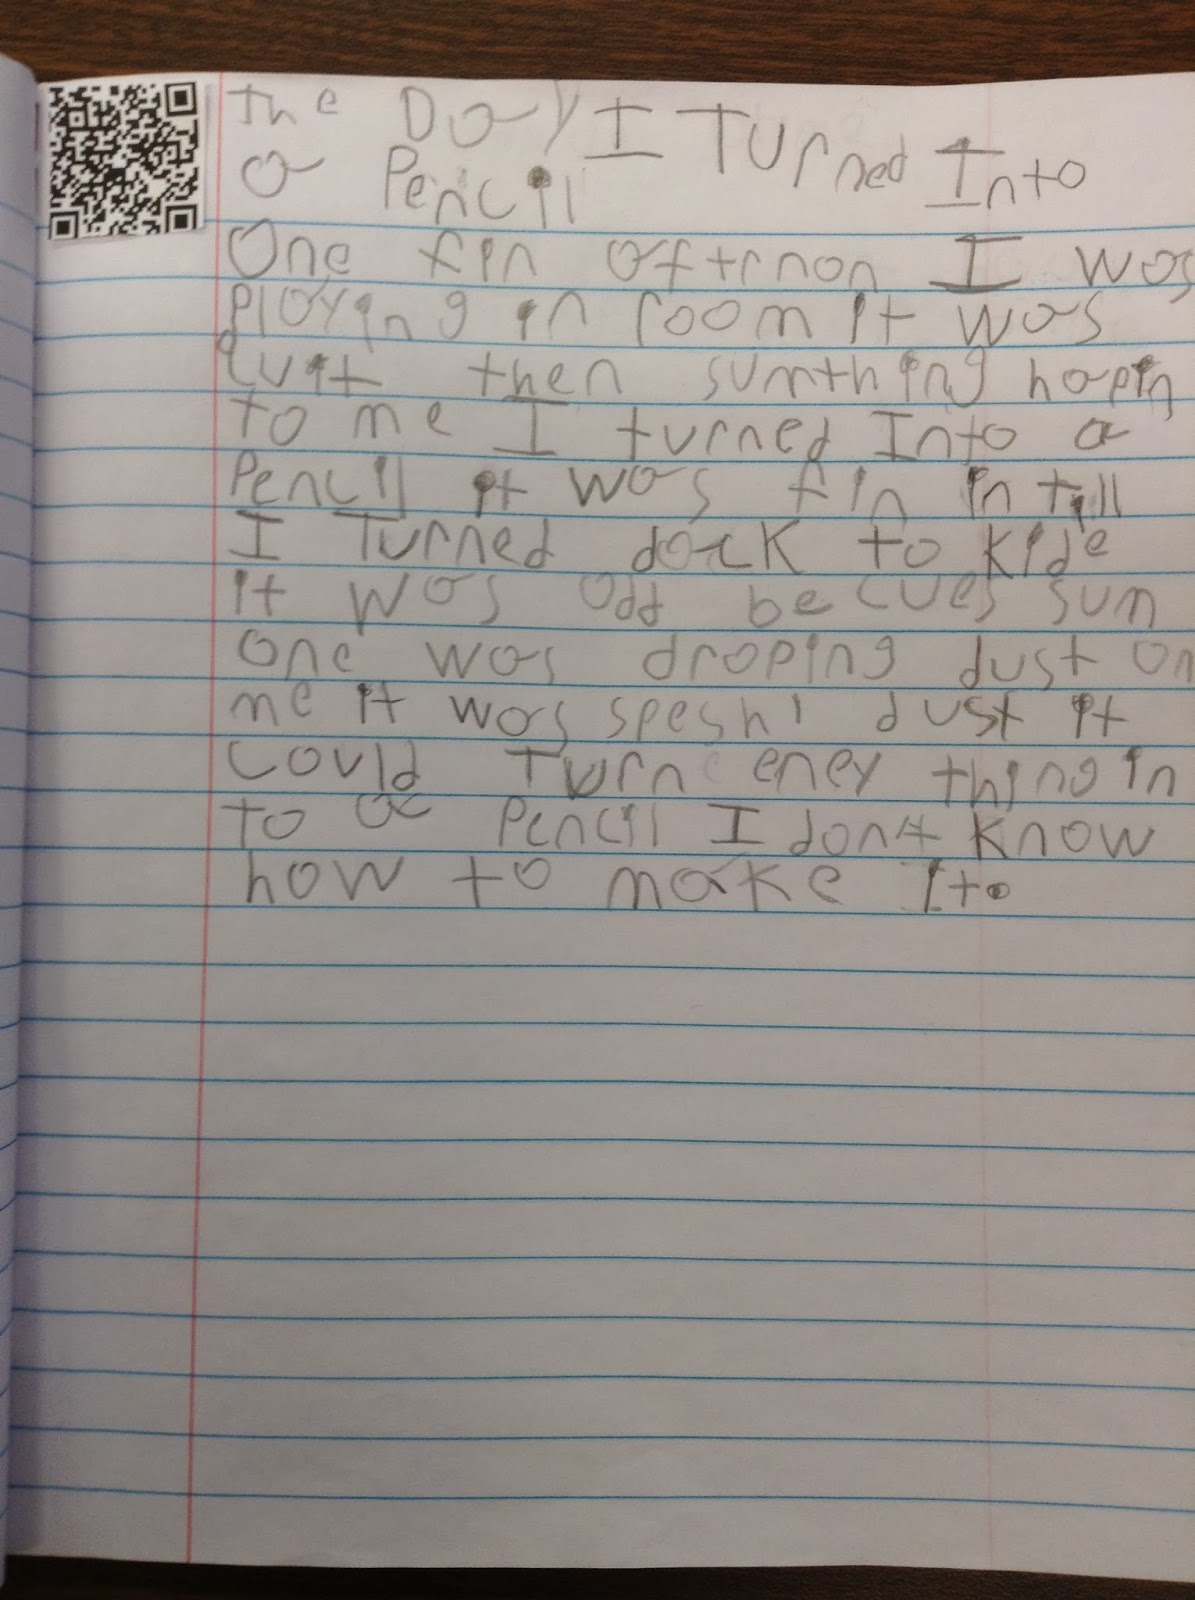

Ms. Nason, Grade 3, Add Voice to a Writer's Notebook


iPad Cart


Friday, January 17, 2014

New Apps for SAD6 iPads

Below is an email message that I sent to my staff (K-5 teachers) today.

I have added a few new apps to all of the carts.

*ScribblePress - A fabulous book creating app with excellent art tools, stickers, and the ability to import photos. The template has a Title Page, Story Section, and Author Page. Books can be exported to iBooks or sent by email. More info or More info

Story Me - The app that I raved about recently. Students can create comic strips and share easily.

Zalairos Adventures by Skoolbo - This app is loaded with 25 different read along chapter books. 

*Green Screen by Do Ink - Capture videos of students in front of a green screen and then add any background you want. Your students can be in the Rain Forest, in front of the White House, or even on top of a mountain.

Funny Movie Maker - Use your mouth on any picture and record your voice. An extremely fun creation app. Students will love to say their multiplication facts, describe a project, or state their vocabulary words & meanings.

Number Pieces - A virtual set of Base Ten blocks.

Chicken Coop Fractions - A fun way to work with and learn about fractions.

Geoboard - A virtual geoboard. No more flinging rubber bands. :0)

The two starred items above are paid apps and have been also added to your classroom iPads.

Have a great long weekend!
Nicole Gleason
Technology Teacher/Integrator SAD#6
BlogWebsite, and Wiki
George E Jack, Steep Falls, Edna Libby, and HB Emery Schools

In the final analysis it is not what you do for your children but
what you have taught them to do for themselves that 
will make them successful human beings. 
Ann Landers

Wednesday, January 8, 2014

NWEA/MAP Web-based Testing

During the month of January I will be proctoring NWEA/MAP tests in all four of my elementary schools. In the past we have used software that is downloaded onto computers to administer the test, but this year the test is on-line. A secure browser, provided by MAP, needs to be downloaded onto each computer. Other than that, testing is web-based or quoted from my new favorite movie, The Internship, "on the line".

There is always a learning curve when trying stuff for the first time, so I would like to share some of the things I have learned so far to help make the testing experience a bit smoother for any educators that have to administer web-based NWEA/MAP testing.

1. Only one testing session can be run at a time, per educator account. Often some students do not finish within the allotted 70 minutes that classes are scheduled to be in the lab testing. In the past I have allowed the students to remain with the next scheduled class to finish testing by pausing their test and then once the next class is ready to test the students from the previous class can continue testing. The best way to continue with this practice within the new system is to suspend the unfinished tests, start a new session with the next class, and then add the students that need to finish their test to the new testing session.

2. Test session names are randomly created. If you get an awkward name, end the session and start over. I had one session come up as swore4646.

3. Have students log into the session first before you go over the instructions. The first time I tested a class, I did not realize that it would get to a point where students have to wait for the proctor to confirm testing to begin. Once I get students to the place where it asks for students to wait for a proctor, I then go over the instructions.

4. Great resources: Testing Step by Step and Student Practice Plus Prep

Happy testing!

Thursday, December 19, 2013

Descriptive Winter Writing (Good for any Season)


Even though this type of project has been around for some time, it is worth a mention for extended ideas or for teachers that may have not experienced this type of descriptive writing project.

In this case the classroom teacher, Suzanna Pinette - 2nd grade, had her students draw a picture of a snowman on plain white paper. After the students created their drawing, they were to write a detailed description of their snowman, keeping in mind that the more detailed their description was, the better chance that whoever was going to draw the picture would be able to recreate the snowman by reading the description. Then Ms. Pinette mailed the descriptions to her twin sister who also teaches second grade. Each student in the other second grade class received a description and tried to recreate the snowman according to the description they were given. Next both classes took part in a video chat where a teacher read descriptions and students compared the snowmen from the two different classrooms. Students learned that the better the description, the closer that the two snowmen looked alike. In some cases there were three snowmen, since the number of students from each classroom is not the same.

The next step for these two classrooms is for the students from the opposite class to write a descriptive writing piece and do a role reversal. Paying closer attention to details each time the students engage in this project will allow students to get a better sense of descriptive writing.

Other teachers have done this type of project with jack-o-lanterns, Christmas ornaments, monsters, etc. This wonderful descriptive writing challenge can really be used in about any setting to fit with current curriculum or fun around different holidays. Other options are to use an art app on an iPad and create the artwork via technology. Descriptions could be typed up in a doc and sent via email rather than snail mail. This project could also be done real time using apps like BaiBoard. There are many many possibilities with the technology we have available to us.


Tuesday, December 10, 2013

Hour of Code

This week is a very exciting week for students and teachers alike across the nation. Yesterday, Monday December 9th, was the Hour of Code Kick-off and what a day it was! After the morning assembly at George E Jack School, students got right to work learning to code with simulations from code.org and Apps like Kodable and Light-bot loaded onto iPads. I heard stories from teachers who noticed how students that don't normally shine during a school day were helping classmates figure out the solutions. It was amazing to witness how engaged the students were. At about 10:30 we learned that students would be going home at 1:00 due to a snowstorm. Yikes! We were planning on watching the live streaming with Gabe Newell at 1:00 and then be involved in the Bill Gates Live Video Chat at 3:30. Then the Jack Dorsey Video Chat at 3:50. What is a technology integrator to do except invite the students that were going to stay after school for the live chats over to her home? That is exactly what I did and fortunately most students lived close by to my home. We had a wonderful chat with Bill Gates and Jack Dorsey. 

The video chat with Jack Dorsey is embedded below and the Bill Gates video is not yet available. There is still time for you to get your students involved. Visit http://code.org/educate/hoc for more information on bringing Hour of Code to your school.


Highlights from Hour of Code at George E Jack School


Highlights from Hour of Code at HB Emery School


Highlights from Hour of Code at Edna Libby School


Highlights from Hour of Code at Steep Falls School


Presentation for the Kick-off Assembly
(Feel free to use the Prezi.)


Monday, November 18, 2013

Educreations in Kindergarten!


In the past I have mostly worked with grades 2-5. I was extremely excited when I learned that this year I would be able to open up my services to K/1 teachers and students. I was looking forward to seeing how younger students would tackle creation apps. Wow, was I blown away with kindergarten & first grade classes as to how quickly the students pick up, navigate, and create with Educreations. I think that Educreations is one of the most versatile tools for any grade and subject matter. Plus it is simple enough of a tool to use without tutorials. Students can demonstrate their understanding of any concept, explain their thinking, and share their knowledge. Best of all students love using Educreations. They are so excited to hear their own voice and especially thrilled when their work is projected for the whole class to view. I have embedded some examples from one of my kindergarten classes. I am so amazed with their work!

Tips for working with younger students… 1. Have the students work on the app immediately after a quick intro, then when it is time to save the teacher can log into the account. 2. Stay logged into Educreations on iPads that stay in your classroom. 3. Make the password simple when you create your account if you want your students to eventually sign in on their own. 4. Use one teacher account for all of the iPads in your classroom.


Friday, November 8, 2013

iPad Tips and Tricks for Quicker Navigation and Management

iOS7 has included some wonderful time-saving features that will help managing a classroom set of iPads less time consuming or working with an iPad quicker. Plus I listed a couple overlooked helpful features from previous iOS versions.

1. For automatic app updates: settings > iTunes & App Store > Updates on (Green with white dot to the right. See Photo.)

2. Newish - came with ios6 update, if you have one Apple ID for your class set of iPads, new purchases can be pushed to all iPads: settings > iTunes & App Store > Apps on  (Green with white dot to the right. If you are sharing an Apple ID with other classrooms, you may not want to use this option because any apps other teachers purchase will be pushed to your iPads.)

3. Searching for apps can be done from any page now: Put a finger near the top row of apps and rub your finger downwards. Type in the first couple letters of the app you are searching for and it will appear. Click on it and the app will open up. If your finger starts off too high on the screen, you will pull down the calendar instead.

4. Double clicking the home button always brought up a list of recently used apps, but now they are displayed in a larger icon that you can easily flip up off the page to reset the app or disable them from running in the background.

5. If your battery does not seem to be holding the charge like it used to, plug the iPad into a computer, back it up, then restore the iPad from the back up.

6. With a finger at the very bottom of the screen on your iPad, slide your finger upwards. This will open up the control center for quick access to volume, wifi, a timer, the camera, your Apple TV, and a few other controls that you may want quick access to.

7. Not new, but worth the mention, there are settings that can be turned on so that any highlighted text will be read by the iPad. See video below.


Wednesday, October 16, 2013

Looooving AudioBoo!!!

I have used numerous audio recorders throughout the years and I have to say AudioBoo is by far the best app and site I have tried. One stop shopping at it's best!

Today I was working with a class of second graders and we were going to record student stories using a site I have used in the past, well that site was not working. None of the apps or sites I have used in the past were going to work for what we needed without having a gazillion steps. The second grade students wrote stories and drew a picture of the character in their story. The classroom teacher, Julie Lariviere, wanted to have her students record themselves reading their story and then create a QR code to add to the poster so that whoever scanned the QR code would be able to hear a student reading their story. So, it was on to plan B. I downloaded AudioBoo after reading that the recordings would be saved to an account. It would be easy enough to generate QR Codes with web addresses for each of the audio files. I was pleasantly surprised that AudioBoo has it's own QR Generator built into the site and can be used on any device. The audio file must be created using the app, but then what you do with the file can be done by logging into your account on a tablet or a computer.


The link to each audio file will look similar to the photo on the left.

Highlights of the site, in yellow:

1. Easy playback.

2. Embed Code for placing the audio directly on a site. (See below for an embedded audio file.)

3. Save directly to iTunes as a Podcast.

4. Generate QR codes.


There are so many great ways to use AudioBoo in the classroom. Here are a few suggestions.

1. fluency
2. verbal directions
3. question of the day
4. audio books
5. message home to parents
6. students answering a question
7. correct answer check - QR code leads students to correct answers.
8. poetry reading
9. scavenger hunts
10. ...and much much more.

Thursday, October 3, 2013

Teaching Internet Safety


With the increase in student access to internet ready devices, safety while on the internet and digital citizenship should be addressed throughout the school year. Fortunately in my school district we have a plan for grades 2-5 with set lessons that students will receive each school year. My other half and I teach a specific lesson for each grade level. Classroom teachers address internet safety throughout the school year as well.

In case you are looking for ideas for your classroom or school, here is what we teach consistently for each grade level.


Grade 2

Michelle Ledue, a second grade teacher, and I recorded students talking about what her students learned about internet safety after watching a BrainPopJr video three years ago. Michelle then went on to have students create some cute intros and she put a video together. Since then I have been sharing Michelle's class video with all my second grade students plus show them the BrainPopJr video. After watching BrainPop we have a discussion about internet safety and take the on-line quiz. When taking the quiz as a class, I have students vote on the answers by displaying the number of fingers in the air to have an a=1, b=2, c=3, and d=4. Once we have finished the quiz students create an internet safety digital book or digital drawing. For this project I have used a variety of software, apps, and sites. Some of my favorites: Tar Heel Reader, Book Creator, StoryKit, and KidPix installed on Macs.


Grade 3

Third graders are not usually very shy in front of the camera so it is a great grade level to take advantage of their eagerness to be a star. In third grade we have students watch a couple videos of other students performing skits, talk about internet safety, discuss what they could do to teach others about internet safety, break up into small groups to write and practice skits, then record their skits. I post their work on my website or internet safety wiki and send the videos to our district's television station. Students are so excited to know that they are going to be famous on BETV. The two example skits I have been showing students this year are a skit I found on TeacherTube and one that a group of my third graders made last year, video embedded below.


Grade 4


In fourth grade we have students watch a video showcasing students singing about internet safety as a refresher of what they have learned in previous years and then we focus on social network safety. This is about the age that many students are starting to use social networks in their private lives. They may have been exposed to some during school, like Twitter or Edmodo. Often, in the classroom, the account is managed by the classroom teacher which is a great way to model appropriate use of social networks. However, students are also starting to use similar accounts on their own and it is important that we have conversations with students about being safe. I found a wonderful video that showcases students talking about being safe on social networks. I show this video to students, we talk about being safe, what social networks are, then students pick a social network that they use, and answer some questions in their Google Drive account. This year I had students who were not camera shy let me record them talking about the sites they chose so that I would have another video to share with fourth grade students, embedded below.


Grade 5

The fifth grade lesson focuses on Think Before You Post. Just like the fourth grade lesson, we review previous internet safety tips by watching a different video than the fourth grade lesson showcasing students singing internet safety tips. We discuss the tips mentioned in the song and then we watch the Think Before You Post video. This video is a very strong visual demonstration of how once something is posted on-line anyone can see it and it can never truly be deleted. The video usually generates a good discussion on what should not be posted on-line. Then I have the students write fake Facebook posts either on a Google Doc, Edmodo, or their blog. Next I have students share their posts with classmates. Lastly classmates evaluate each other's posts on whether the fake post would or would not be safe to post on-line.